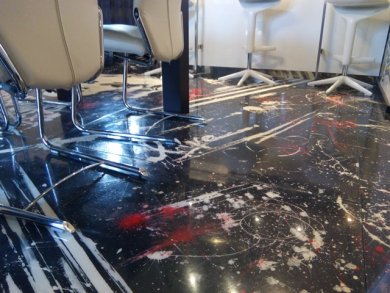
Decorative epoxy resin floor!
In this article, we'll show you a video and describe a decorative Apselive 30 resin floor application!
Our steps and the necessary materials:
- We prepare the surface (screed, tiles, wood, etc.), in order to obtain the best adhesion with our material. We grind it and remove the dust.
- Prepare the primer, a two-component material, with the addition of quartz fillings (for a better viscosity) and apply it with the help of spatula on the prepared surface.
- After 12-24 hours the primer has dried. We sweep away the sand, (which can be safely reused). Grind (80 grain) and sweep away the residual dust(the dust can not be reused).
- Then we pass to the application of the first layer of the floor. Mix, following the dosages, the self-leveling floors Apselive 30 mesh adding a little bit of a quartz fillings. Mix the two components considering the use of 1-1.5 kg. per m² at a thickness of 1-2 mm. Then apply it in a thin layer with the help of spatula.
- Pour the mixture onto the prepared surface. Use the spatula to spread it over the entire surface. 10-15 minutes after application, switch to a spiked roller to de-aerate.
- After 12-24 hours of application of the first layer we apply the protective finish. To create a "non-slip" effect also add a mapefloor filler.
- After 12-24 hours apply the second layer of protective finish.
- Protective finishes are applied by a roller. Before applying the second layer, the first layer must be dry (8-24 hours)
It took 3 days to complete this selflevelling floor. The result is visible on photos and videos.


